Wire wrapping PDF TUTORIAL Wire wrap FLOWER CUFF BRACELET Step by step lesson how to make jewelry DIY Instant Download
- Digital download PDF file - Instant Download
- Skill level: beginner with basic skills / Intermediate
- Technique: wire work
- Over 30 pages
- Over 100 photos (mainly close-ups)
- Step by step lesson
- In addition, this tutorial covers patina and polishing
- Convenient for studying on a mobile phone or computer
The file is an instant download. You can download this file as soon as you complete your purchase.
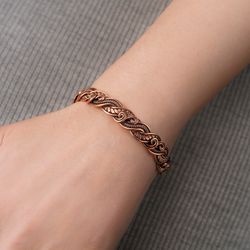
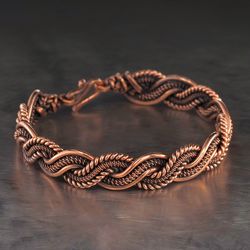
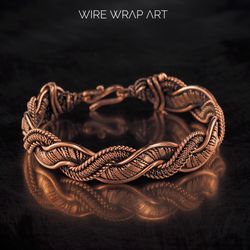
This wire wrapped cuff bracelet is our exclusive development.
Skill level: below average wire skills.
The tutorial is chock-full with information, tips, advices on “how to”, all these supported by over 100 clear, full color pictures (many close-ups) with relevant, detailed instructions given right beside them, within over 30 pages.
You will receive a PDF file that includes all the information you need to create this bracelet.All stages of work are described in great detail.
We advise you to first read the tutorial on a computer or phone, and then select the pages you want to print to have at hand.
Making a bracelet considering all sizes, you will get a bracelet that fits on a wrist 6"-7" (15-17cm). But you can easily make a bracelet of a different size. To do this, you need to change the length
of the base wires from which the base of the bracelet is made.
In addition, this tutorial covers patina and polishing. This is exactly what our subscribers often ask us about. And we decided not to make a separate tutorial on this topic, but to tell everything here.
For this tutorial, you will need copper wire of various gauges and a set of tools for working with wire. You will also need some little things that can be found in every home or workshop.
YOU WILL NEED:
• Round copper wire: 14 gauge, 17 gauge, 18 gauge, 20 gauge, 26 gauge
• Beads 6mm
• Curved nose pliers
• Flat nose pliers
• Wire cutters
• Steel bench block
• A hammer
• Metal knitting needle - №4 U.S. standard (3.5mm)
• Flat needle file
• Liver of sulfur (optional)
Soldering is NOT required on this project.
You can use any beads you have. They can be from any material. The main thing is that they are of the correct diameter and they must have holes.
As for the wires, again you have a wide range of options to choose from silver, silvery, bronze to golden, the only thing you have to stick to being the given wire’s lengths and gauges.
All information provided in this tutorial is the personal, and intellectual property. By purchasing you agree to not copy, or distribute the tutorial. It is forbidden to highlight the contents of the textbook or any variations thereof without exclusive express permission. Respect ownership of intellectual property, and do not post the tutorial in forums, blogs and message boards, or share this tutorial in any form. Each sale of this PDF is final. Cannot be returned or exchanged under any circumstances.
Happy jewelry making! We wish you inspiration and creative success!
Thank You for visiting our shop : )